Physical development in early childhood is crucial, encompassing both gross and fine motor skills; resources like downloadable PDFs offer guidance for activities.
Windows 10 offers tools for managing desktop appearance and functionality, but these are separate from child development resources.
Remote Desktop connections are unrelated to physical activity, focusing instead on remote computer access.
Understanding icon management within Windows 10 doesn’t directly contribute to a child’s physical growth or skill development.
The Importance of Physical Activity
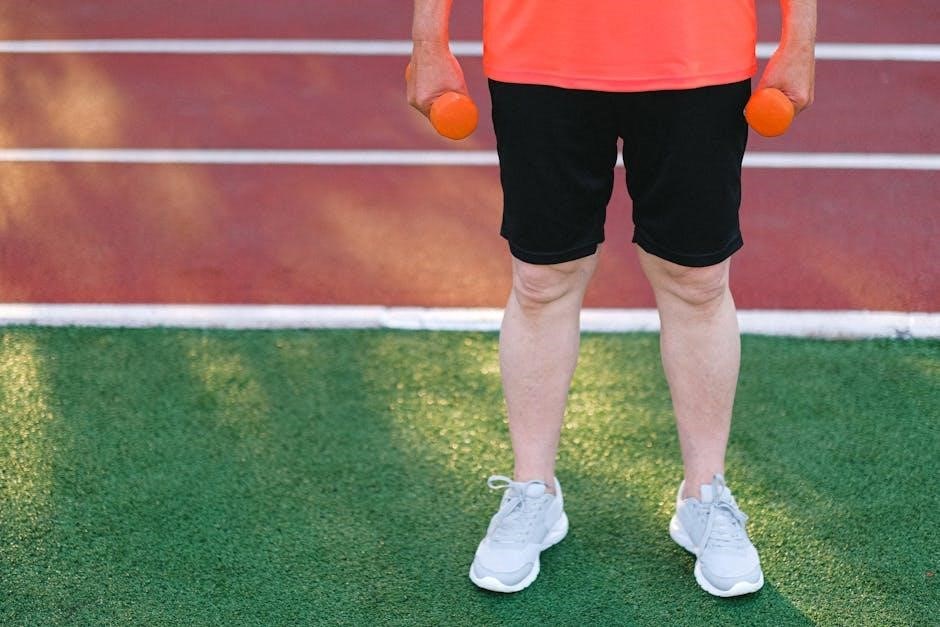
Physical activity is fundamentally vital for 3-5 year olds, fostering healthy growth and development across multiple domains. It’s not merely about expending energy; it’s about building a foundation for lifelong well-being. Gross motor skills, like running and jumping, are honed through active play, while fine motor skills, such as drawing and manipulating objects, benefit from targeted activities.
While Windows 10 offers desktop customization options, these are irrelevant to a child’s physical needs. Similarly, Remote Desktop functionality doesn’t contribute to physical development. Accessing PDF resources detailing age-appropriate exercises and games is far more beneficial. These guides often outline activities that enhance coordination, balance, and strength, crucial elements for school readiness and overall health.
Understanding icon management or uninstalling apps in Windows 10 doesn’t replace the need for active play and structured physical development programs.
Gross Motor Skills Development
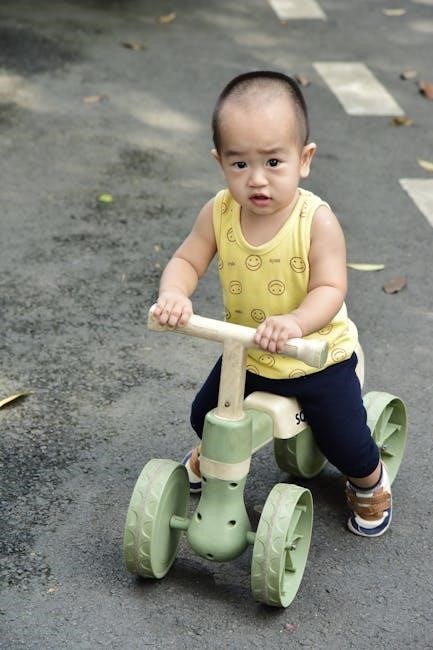
Gross motor skills – involving large muscle movements – are rapidly developing in 3-5 year olds. Activities like running, jumping, climbing, and throwing are essential for building strength, coordination, and balance. PDF resources often provide structured games and exercises designed to enhance these skills, offering progressive challenges as children grow.
However, Windows 10 features, such as desktop customization or Remote Desktop access, have no bearing on this physical development. While managing desktop icons or uninstalling apps might be useful for adults, they don’t support a child’s physical needs.
Effective PDF guides will focus on creating opportunities for active play, emphasizing safe environments and appropriate equipment.
Fundamental Movement Skills
PDF guides detail core skills – running, jumping, throwing – vital for 3-5 year olds; Windows 10 features are irrelevant to these physical milestones.
Running and Locomotor Skills
Locomotor skills, like running, are foundational for 3-5 year olds, building coordination and confidence. PDF resources often showcase games promoting these skills, such as simple races or obstacle courses. These activities enhance cardiovascular health and spatial awareness.
While Windows 10 offers desktop customization, it doesn’t relate to physical development. Similarly, Remote Desktop access or managing desktop icons are unrelated to a child’s ability to run or move effectively. Focus should remain on age-appropriate physical challenges.
PDF guides provide structured exercises, ensuring safe and progressive skill development, unlike software-based tasks.
Jumping and Hopping
Jumping and hopping are vital for developing leg strength, balance, and coordination in preschoolers. PDF activity guides frequently include suggestions like jumping over small objects or hopping on one foot, progressively increasing difficulty. These exercises contribute to overall physical literacy.
Information regarding Windows 10 features, such as desktop icon arrangement or Remote Desktop connections, is irrelevant to these physical skills. Managing apps or uninstalling programs doesn’t support a child’s motor development.
PDF resources offer structured progressions, ensuring children safely build these skills, unlike unrelated computer tasks.
Throwing and Catching
Throwing and catching are fundamental skills enhancing hand-eye coordination, spatial awareness, and upper body strength in 3-5 year olds. PDF guides often suggest starting with large, soft balls and gradually decreasing size. Activities like beanbag tosses or simple ball games are commonly featured.
Discussions about Windows 10, including app management or Remote Desktop access, are unrelated to these physical activities. Adjusting desktop icons or firewall settings doesn’t contribute to motor skill development.
PDF resources provide age-appropriate progressions, ensuring safe and effective skill-building, unlike computer-based tasks.
Fine Motor Skills Development
Fine motor skills, like those honed through PDF-guided activities, are vital for pre-writing skills and dexterity; Windows 10 is irrelevant.
Drawing and Coloring Activities
Drawing and coloring are foundational fine motor skill builders for 3-5 year olds, enhancing hand-eye coordination and pre-writing abilities. Numerous PDF resources detail age-appropriate activities, from simple scribbles to guided shape tracing, fostering creativity and control.
These activities aren’t related to Windows 10 desktop management or Remote Desktop connections. Instead, they focus on strengthening small muscle groups in the hands and fingers. Look for PDFs offering themed coloring pages or drawing prompts to maintain engagement.
Remember, the goal isn’t artistic perfection, but the process of developing control and precision. Icon arrangement on a computer desktop has no bearing on this developmental stage.
Cutting and Pasting
Cutting and pasting significantly refine fine motor skills in preschoolers, demanding bilateral coordination and hand strength. PDF activity guides often present simple cutting exercises – straight lines, shapes, and eventually, following dotted paths – building dexterity. Pasting reinforces pincer grasp and spatial reasoning.
These skills are distinct from Windows 10 functionalities like app uninstallation or Remote Desktop access. PDF resources may include templates for creating collages or simple scenes, encouraging creativity alongside skill development. Safety is paramount; supervise children closely during cutting.
Focus on the process, not perfection; the act of manipulating scissors and glue is key. Desktop icon customization is irrelevant to this developmental milestone.
Building and Construction Play
Building and construction play – with blocks, LEGOs, or even recycled materials – is vital for fine motor skills and problem-solving. PDF activity sheets can offer building challenges, inspiring creativity and spatial reasoning. These activities enhance hand-eye coordination and dexterity, crucial for later writing skills.
Unlike Windows 10 features like adjusting desktop icons or utilizing Remote Desktop, construction play is a hands-on, tactile experience. PDF guides may suggest themed builds (houses, towers) or open-ended exploration. Encourage children to plan and execute their designs.
This fosters critical thinking and perseverance, skills unrelated to computer operating systems.

Activities to Enhance Gross Motor Skills
PDF resources detail games like tag and obstacle courses, promoting running, jumping, and coordination; these activities are unrelated to Windows 10 features.
Obstacle Courses for Preschoolers
Obstacle courses are fantastic for developing gross motor skills in 3-5 year olds, as detailed in many physical development PDFs. These courses can be simple, utilizing household items like pillows, blankets, and tunnels.
Encourage children to crawl under tables, step over cushions, and walk along taped lines. Variations can include hopping, skipping, or even bear-walking sections. Remember, safety is paramount; ensure a soft landing surface and adequate space.
Windows 10 desktop management or Remote Desktop connections are irrelevant to this activity. The focus remains on fostering physical activity and coordination through playful exploration.
Outdoor Games: Tag, Hide-and-Seek
Classic outdoor games like tag and hide-and-seek are excellent for promoting physical development in preschoolers, often outlined in physical activity PDFs. These games encourage running, chasing, and spatial awareness, building both gross motor skills and social interaction.
Tag improves cardiovascular health and agility, while hide-and-seek enhances problem-solving and observational skills. Ensure a safe playing environment, free from hazards. Adapt rules for younger children, focusing on fun and participation.
Windows 10 features, such as icon customization, are unrelated to these active games. The core benefit lies in fostering physical activity and social skills.
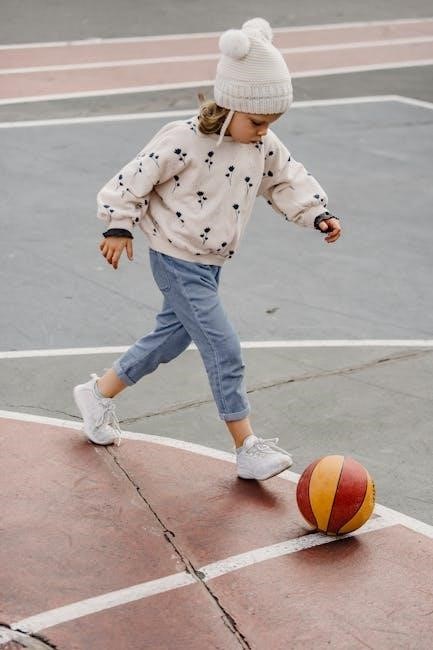
Ball Games: Kicking, Rolling
Ball games, including kicking and rolling, are fundamental for developing gross motor skills in 3-5 year olds, often detailed in physical development PDFs. These activities enhance coordination, balance, and hand-eye (or foot-eye!) coordination. Simple kicking practice builds leg strength and control, while rolling encourages tracking and reaching.
Introduce varied ball sizes and textures for sensory exploration. Adapt the games to skill levels; rolling a ball to a target is easier than precise kicking; Safety is key – ensure ample space and soft balls.
Windows 10’s features, like Remote Desktop, are irrelevant to these physical activities.
Activities to Enhance Fine Motor Skills
Fine motor skill development, detailed in physical development PDFs, involves activities like drawing, cutting, and building, improving dexterity and hand strength.
Windows 10’s desktop features are unrelated.
Playdough and Clay Modeling
Playdough and clay modeling are exceptional fine motor skill builders for 3-5 year olds, readily detailed in physical development activity PDFs. Squishing, rolling, pinching, and shaping strengthen small muscles in hands and fingers, crucial for future writing skills.
These tactile experiences also foster creativity and hand-eye coordination. PDF resources often suggest incorporating tools like rolling pins, cookie cutters, and plastic knives to further refine dexterity. Remember, Windows 10 desktop customization is irrelevant here; the focus is entirely on physical development.
Exploring different colors and textures enhances sensory exploration, while creating recognizable shapes boosts cognitive skills.
Bead Stringing and Lacing
Bead stringing and lacing activities are fantastic for honing fine motor skills in preschoolers, with numerous ideas available in physical development activity PDFs. These tasks demand precise hand-eye coordination and the pincer grasp – essential for writing and self-help skills.
PDF guides often suggest starting with larger beads and thicker laces, gradually decreasing size for increased challenge. Unlike managing Windows 10 icons or utilizing Remote Desktop, this activity directly impacts physical dexterity.
Color sorting and pattern creation add a cognitive element, making it a well-rounded developmental exercise.
Puzzles and Shape Sorting
Puzzles and shape sorting are invaluable tools for developing fine motor skills and problem-solving abilities in young children, often detailed within physical development activity PDFs. Manipulating puzzle pieces strengthens the pincer grasp, crucial for future writing endeavors.
PDF resources highlight the importance of starting with simple puzzles – large pieces, few components – and progressing to more complex designs. This contrasts sharply with Windows 10’s desktop management or Remote Desktop functionality.
Shape sorting enhances spatial reasoning and visual discrimination, contributing to overall cognitive growth alongside physical dexterity.

Creating a Physically Active Environment
Dedicated spaces, both indoors and outdoors, are vital for encouraging movement; PDF guides detail setup and safety, unrelated to Windows 10 features.
Indoor Activity Spaces
Transforming indoor areas into active zones is essential, especially during inclement weather. Utilize PDF resources for inspiration on creating safe and stimulating environments. Consider soft play equipment, tunnels, and designated areas for movement games.
Remember that Windows 10 desktop customization or Remote Desktop access are irrelevant to this physical space. Focus on maximizing available space, ensuring it’s free from hazards, and providing varied activities.
Simple setups, like obstacle courses using pillows and blankets, can be incredibly effective. Prioritize safety and age-appropriateness, referencing PDF guides for detailed activity suggestions and modifications.
Outdoor Play Areas
Outdoor spaces offer unparalleled opportunities for physical development. Utilize PDF resources to design areas that encourage running, jumping, climbing, and exploration. Consider incorporating natural elements like sand, water, and varied terrain.
Remember, managing Windows 10 icons or utilizing Remote Desktop connections has no bearing on creating a beneficial outdoor play environment. Prioritize safety with soft surfacing under play equipment and clear boundaries.
Simple additions like balls, hoops, and chalk can inspire countless games. Refer to PDF guides for age-appropriate activity ideas and ensure adequate supervision to foster a safe and engaging experience.

Integrating Physical Activity into Daily Routines
PDF guides suggest weaving movement into daily life – quick stretches, active transitions, and playful breaks enhance physical development throughout the day.
Movement Breaks During Circle Time
Circle time doesn’t need to be static! PDF resources highlight incorporating brief, engaging movements to boost physical development.
Simple actions like animal walks (bear crawls, crab walks), jumping jacks, or stretching can re-energize children and improve focus.
These short bursts of activity support gross motor skills and provide a welcome change of pace.
Consider themed movements related to the circle time topic – for example, “fly like a bird” during a story about birds.
Remember, Windows 10 desktop management or Remote Desktop access aren’t relevant to these physical activities.
Keep breaks brief (30-60 seconds) to maintain engagement and seamlessly return to the lesson.
Active Transitions Between Activities
Transform routine transitions into opportunities for physical activity! PDF guides suggest creative ways to move between learning centers or tasks.
Instead of simply saying “line up,” have children hop like bunnies, slither like snakes, or walk like penguins to their next destination.
These active transitions reinforce gross motor skills and make the classroom more dynamic and fun.
Incorporate counting or color recognition into the movements – “Hop five times!” or “Walk to the blue rug like a bear!”
Windows 10 settings or Remote Desktop features are unrelated to these movement-based transitions.
Active transitions help children release energy and improve focus for the upcoming activity.

Safety Considerations for Physical Activities
PDF resources emphasize supervision, appropriate equipment, and ample space for safe play; Windows 10 settings are irrelevant here.
Ensure a secure environment, free from hazards, while fostering physical development.
Supervision and Spotting
Constant adult supervision is paramount during all physical activities for 3-5 year olds, as detailed in many physical development PDF guides. Active monitoring allows for immediate intervention, preventing injuries during activities like running, jumping, or using play equipment.
Spotting – providing physical support – is crucial when children attempt new or challenging movements. This is especially important during activities involving height, such as climbing or jumping from low platforms. While Windows 10 offers remote access features, they are unrelated to ensuring a child’s physical safety.
PDF resources often highlight the importance of understanding each child’s capabilities and providing assistance accordingly. Remember, icon management or desktop app uninstallation doesn’t contribute to safe play.
Appropriate Equipment and Space
Selecting age-appropriate equipment is vital for safe physical development, as emphasized in many physical development PDF guides. Toys and tools should be sized correctly to prevent choking hazards and facilitate successful participation. Ensure equipment is well-maintained and free from defects.
Adequate space is equally important; a clear, open area minimizes the risk of collisions and allows children to move freely. While Windows 10 allows for desktop icon customization, this has no bearing on physical activity space.
PDF resources often detail specific space requirements for different activities. Remember, remote desktop access or app uninstallation doesn’t contribute to a safe play environment.
Resources for Physical Development Activities (PDFs)
Numerous PDFs detail physical activities for young children, though unrelated to Windows 10 features like Remote Desktop or icon management.
Links to Reputable Websites
Finding reliable resources for physical development activities requires careful selection. While information regarding Windows 10 features – such as managing desktop icons or utilizing Remote Desktop – is readily available online, it’s irrelevant to this topic.
Instead, focus on websites dedicated to early childhood education and development. Zero to Three (zerotothree.org) offers valuable insights and activity suggestions. PBS KIDS (pbskids.org) provides engaging games and resources promoting movement. Pathways.org (pathways.org) delivers expert advice on child development milestones. These sites often feature downloadable PDFs with structured activity plans, ensuring age-appropriateness and safety.
Remember to prioritize websites with credentials in child development and avoid those offering generic or unverified information.
Recommended PDF Downloads
Numerous PDF resources detail physical development activities for 3-5 year olds. While guides on Windows 10 – covering topics like app uninstallation or icon customization – are plentiful online, they are unrelated to this subject.
Search for PDFs from organizations like the National Association for Sport and Physical Education (NASPE), now SHAPE America. Look for documents outlining age-appropriate movement skills and game ideas. Many university extension programs also offer free downloadable activity guides. These PDFs typically include detailed instructions, safety guidelines, and modifications for diverse abilities.
Ensure the PDF source is reputable and the activities align with established developmental milestones. Prioritize resources created by qualified educators or physical therapists.

Adapting Activities for Different Abilities
PDF resources often suggest modifications for children with delays, promoting inclusive play; Windows 10 tips are irrelevant here.
Modifications for Children with Delays
PDF guides specializing in physical development frequently detail adaptations for children experiencing developmental delays. Simplifying tasks is key; for example, during a throwing activity, use larger, softer balls. Reduce the distance for throwing or catching. When navigating obstacle courses, provide physical assistance or shorten the course length;
Consider sensory sensitivities – a child overwhelmed by noise might benefit from quieter activity spaces. Break down complex movements into smaller, manageable steps. Windows 10 desktop customization or Remote Desktop access are unrelated to these adaptations. Focus on celebrating effort and participation, rather than solely on achieving a specific outcome, fostering a positive and encouraging environment.
Inclusive Play Ideas
PDF resources on physical development emphasize inclusive play, benefiting all children. Adapt games like tag by allowing children to move at their own pace or use assistive devices. Modify ball games by using lighter balls or allowing rolling instead of throwing. Obstacle courses can be made accessible with ramps or wider pathways.
Pair children with different abilities to encourage peer support and learning. Focus on cooperative games rather than competitive ones. Remember that Windows 10 settings or Remote Desktop features don’t contribute to inclusive play. The goal is to create a welcoming environment where every child can participate and experience success, fostering social-emotional growth alongside physical skills.