VicoHome Bird Feeder Manual: A Comprehensive Guide
This comprehensive manual details the assembly, setup, and operation of your innovative VicoHome Bird Feeder. It guides you through app connection, AI features, and troubleshooting, ensuring a delightful bird-watching experience.
Welcome to the world of intelligent birdwatching! The VicoHome Bird Feeder isn’t just a feeding station; it’s a gateway to understanding and appreciating the avian visitors in your backyard. This innovative device combines a high-quality bird feeder with a smart camera, bringing the beauty of nature directly to your fingertips.
This manual serves as your complete guide to unlocking the full potential of your VicoHome Bird Feeder. From initial setup and connection to the VicoHome app, to exploring advanced features like AI bird recognition and cloud storage, we’ll walk you through every step; We aim to provide detailed instructions for assembling, setting up, and using your new device.
Prepare to be amazed by the ability to identify different bird species in real-time, capture stunning photos and videos, and learn fascinating facts about your feathered friends. The VicoHome experience is designed to be both enriching and effortless, allowing you to connect with nature in a whole new way. This manual will guide you through each step, ensuring a seamless and enjoyable experience.
Unboxing and Component Checklist
Carefully unpack your VicoHome Bird Feeder and verify that all components are present and undamaged. This ensures a smooth setup process and optimal performance. Before proceeding, please take a moment to inventory the contents of the box against the list below.
Your VicoHome Bird Feeder package should include:
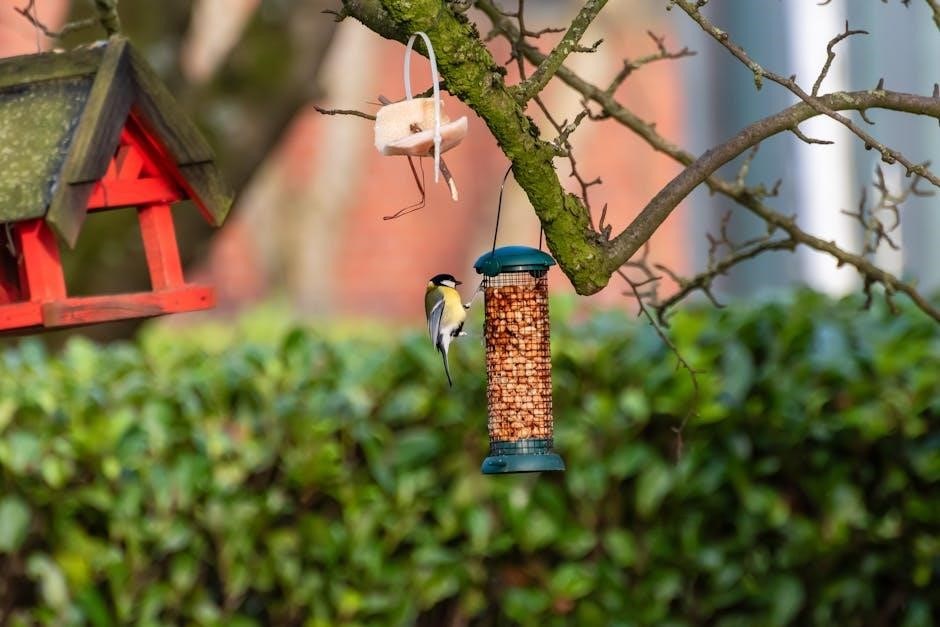
- Bird Feeder Body: The main housing unit with integrated camera.
- Seed Container: Detachable container for holding birdseed.
- Mounting Bracket: For secure attachment to a pole or tree.
- USB Charging Cable: For powering the device.
- Quick Start Guide: A simplified guide for initial setup.
- This Comprehensive Manual: Detailed instructions for all features.
If any components are missing or appear damaged, please contact VicoHome customer support immediately. Do not attempt to assemble or operate the feeder if parts are missing. Proper assembly, guided by this manual, is crucial for functionality and longevity. Retain the original packaging for potential returns or warranty claims.
Assembly Instructions
Begin by attaching the Seed Container to the Bird Feeder Body, ensuring it clicks securely into place. Next, mount the Mounting Bracket to the rear of the feeder body using the provided screws. Tighten firmly, but avoid over-tightening to prevent damage.
Select a suitable location for your VicoHome Bird Feeder – a pole or tree branch offering a clear view of the sky and minimal obstructions. Attach the assembled feeder to the chosen mounting point using appropriate hardware (not included), ensuring it is stable and secure.
Before powering on, double-check all connections. Ensure the Seed Container is filled with birdseed appropriate for your local bird species. A full feeder attracts more birds! Finally, connect the USB Charging Cable to the feeder and a power source. Allow the feeder to fully charge before initial use for optimal battery life. Refer to the ‘Powering the Bird Feeder’ section for detailed charging instructions.
Connecting to the VicoHome App: Bluetooth Setup
To connect your VicoHome Bird Feeder via Bluetooth, first, download and install the VicoHome app from your device’s app store. Ensure Bluetooth is enabled on your smartphone or tablet. Open the VicoHome app and create an account or log in if you already have one.
Within the app, select “Add Device” and choose the “Bluetooth Connection” option – this is the recommended method. The app will automatically begin searching for nearby VicoHome devices. Once your bird feeder appears in the list, select it to initiate the pairing process.
The app will prompt you to enter your Wi-Fi network credentials. Ensure you select the correct network and enter the password accurately. This allows the feeder to connect to your home Wi-Fi for remote access and cloud features. The app will then transfer the Wi-Fi configuration to the feeder automatically. A successful connection will be indicated within the app.
Alternative Connection: QR Code Setup
If the Bluetooth connection method fails, or your device isn’t detected, you can utilize the QR code connection as a backup. Within the VicoHome app, after selecting “Add Device,” choose the “QR Code Connection” option. The app will display a unique QR code specifically for your VicoHome Bird Feeder.
Locate the QR code sticker on your bird feeder – typically found on the device itself or within the packaging. Using your smartphone’s camera, scan the QR code. The app will automatically decode the information and initiate the Wi-Fi setup process.
Similar to the Bluetooth method, you’ll be prompted to select your Wi-Fi network and enter the corresponding password. Double-check the accuracy of your credentials before proceeding. The app will then transmit the Wi-Fi details to the feeder. A successful connection will be confirmed within the app interface, allowing you to proceed with configuration.
Initial App Configuration
Once your VicoHome Bird Feeder is connected to Wi-Fi via Bluetooth or QR code, the initial app configuration begins. The app will guide you through a series of essential setup steps to personalize your experience. First, you’ll be asked to create a VicoHome account or log in if you already have one. This account securely stores your device settings and preferences.
Next, you’ll need to assign a name and location to your bird feeder. This helps you identify it easily if you have multiple VicoHome devices. Setting the correct time zone is crucial for accurate event timestamps and scheduling features. You’ll also be prompted to grant the app necessary permissions, such as access to your camera and notifications.
Finally, review the privacy settings and customize notification preferences. You can choose to receive alerts for motion detection, bird visits, or low battery levels. Completing these initial steps ensures optimal performance and a tailored user experience.
Understanding the App Interface
The VicoHome app interface is designed for intuitive control and monitoring of your smart bird feeder. Upon launching, you’ll see a dashboard displaying all connected devices, including your bird feeder. Selecting your feeder opens the main viewing screen. The top of the screen features the live feed, with controls for manual recording and snapshot capture.
Below the live view, you’ll find tabs for accessing different features. The ‘Gallery’ tab houses recorded videos and photos, organized by date and time. The ‘AI Recognition’ tab displays identified bird species, along with associated learning resources; The ‘Settings’ tab allows you to adjust camera parameters, notification preferences, and storage options.
A bottom navigation bar provides quick access to the dashboard, live view, and settings. Familiarize yourself with these elements to fully utilize the app’s capabilities and enjoy a seamless bird-watching experience.
Navigating the Live View
The Live View is your primary window into the world of your feathered visitors. Upon entering, you’ll immediately see a real-time stream from the bird feeder’s camera. Utilize the pinch-to-zoom function for a closer look at the birds. The screen includes several interactive icons for enhanced control.
A prominent record button allows you to instantly capture video footage of interesting activity. The snapshot icon freezes the live feed, saving a high-resolution image. A microphone icon enables two-way audio, letting you potentially deter unwanted guests or simply enjoy the sounds of nature.
The full-screen mode provides an immersive viewing experience, while the brightness adjustment slider optimizes visibility in varying light conditions. Explore these features to personalize your Live View and fully appreciate the vibrant activity at your bird feeder. Remember to check the signal strength indicator for optimal streaming quality.
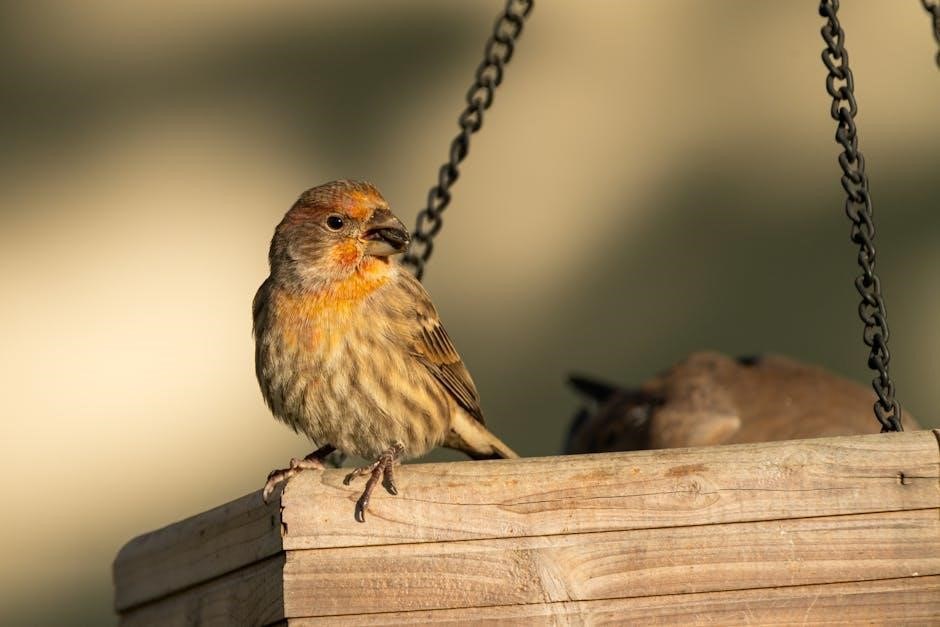
AI Bird Recognition Feature
The VicoHome Bird Feeder boasts an advanced Artificial Intelligence (AI) Bird Recognition feature, transforming your bird-watching experience. This sophisticated system utilizes extensive machine learning algorithms to identify bird species visiting your feeder in real-time. When a bird is detected, the app instantly displays its name, providing valuable insights into your local avian population.
Beyond identification, the AI automatically saves images and video clips of each bird, creating a personal library of your feathered guests. This feature also offers access to a wealth of bird knowledge, including species information, habitat details, and interesting facts.
To unlock the full potential of this feature, a subscription is required. This subscription fuels ongoing algorithm improvements and expands the database of recognizable bird species. Enjoy a deeper connection with nature through the power of AI!
Subscription Details for AI Bird Recognition
To fully utilize the intelligent AI Bird Recognition feature of your VicoHome Bird Feeder, a subscription is necessary. This subscription unlocks continuous improvements to the recognition algorithms and expands the database of identifiable bird species, ensuring accurate and up-to-date identification.
The subscription model provides access to real-time bird species identification, automatic saving of bird images and videos, and comprehensive bird knowledge resources directly within the VicoHome app. Several subscription tiers are available to suit your needs, ranging from monthly to annual plans.
Each tier offers varying levels of cloud storage for your captured media and access to exclusive features. Detailed pricing and plan comparisons can be found within the VicoHome app’s subscription section. Subscribing enhances your bird-watching experience and supports the ongoing development of this innovative technology.
Cloud Storage Options for Bird Videos
The VicoHome Bird Feeder seamlessly integrates with cloud storage, allowing you to securely save and revisit captivating bird videos captured by your feeder. When connected through the VicoHome app, users benefit from complimentary cloud storage for up to three days, providing immediate access to recent footage without additional costs.
For extended storage capabilities, a range of subscription-based storage plans are available. These plans offer increased storage duration, catering to users who wish to archive a larger collection of bird videos over longer periods. The app provides a clear overview of each plan’s storage capacity and associated pricing.
Alternatively, you can utilize a microSD card for local storage, offering a cost-effective solution for long-term video retention. The cloud storage options ensure accessibility from any device, while local storage provides a private and independent backup of your cherished bird sightings.
Local Storage with SD Card
The VicoHome Bird Feeder offers a convenient local storage option using a microSD card, providing a secure and independent way to preserve your bird videos. This is an excellent alternative or supplement to cloud storage, especially for users prioritizing privacy or desiring long-term archiving without recurring subscription fees.
To utilize local storage, simply insert a compatible microSD card (capacity specifications are detailed in the ‘Troubleshooting’ section) into the designated slot within the bird feeder. The feeder will automatically begin recording and saving videos directly onto the card.
Accessing these recordings is straightforward through the VicoHome app. The app interface allows you to browse, playback, and download videos stored on the SD card. Regularly check the card’s storage capacity and consider formatting it periodically to ensure optimal performance. Remember to safely eject the card before removing it from the feeder.

Adjusting Camera Settings
The VicoHome app provides extensive control over your bird feeder’s camera, allowing you to optimize image and video quality for various lighting conditions and personal preferences. Access the ‘Camera Settings’ menu within the app to fine-tune these parameters.
Key adjustable settings include resolution (choose from options like 720p, 1080p, or higher for sharper images), brightness, contrast, and saturation. Experiment with these settings to achieve the most visually appealing results. You can also adjust the field of view, enabling you to focus on a specific area of the feeder or capture a wider scene.
Furthermore, the app allows you to configure image stabilization to minimize blur caused by wind or movement. Night vision settings can be adjusted to enhance visibility in low-light conditions. Regularly reviewing and adjusting these settings will ensure you consistently capture clear and vibrant footage of your feathered visitors.
Motion Detection and Notifications
The VicoHome bird feeder incorporates advanced motion detection technology, alerting you whenever activity is detected near the feeder. Within the app, navigate to the ‘Motion Detection’ settings to customize sensitivity levels. Higher sensitivity will trigger notifications for even minor movements, while lower sensitivity reduces false alarms.
You can define specific activity zones, focusing detection on areas where birds are most likely to land. This minimizes notifications triggered by swaying branches or passing shadows. The app allows you to choose the type of notifications you receive – push notifications directly to your smartphone, or email alerts.
Customize notification schedules to receive alerts only during specific times of day, preventing disturbances during quiet hours. The system intelligently filters out redundant notifications, ensuring you only receive alerts for new events. Properly configuring motion detection and notifications ensures you never miss a moment of bird activity.
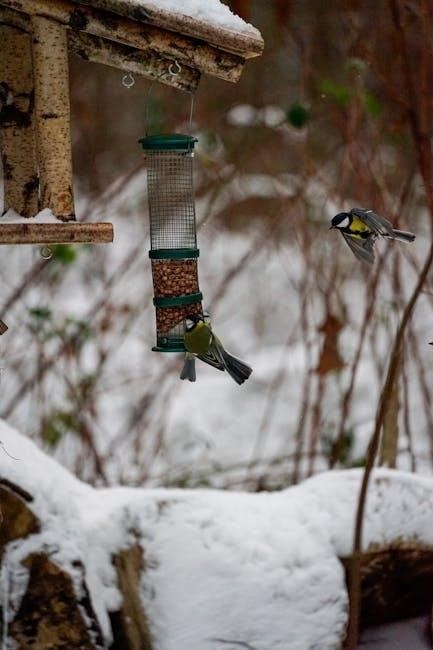
Addressing Squirrel Interference
Squirrels are notorious for raiding bird feeders! While the VicoHome feeder doesn’t feature a mechanical squirrel deterrent, the AI capabilities offer a partial solution. Currently, the AI can detect squirrels, but doesn’t automatically trigger a deterrent. Users have reported the AI identifies squirrels, but they persist in feeding.
The app may, in future updates, include options to sound an alarm when a squirrel is detected, potentially startling them away. For now, consider placement – mounting the feeder on a smooth metal pole, away from trees and structures, can hinder climbing access. Baffles above and below the feeder can also prove effective.
Some users suggest using squirrel-resistant seed blends, like safflower seeds, which birds enjoy but squirrels typically avoid. Regularly cleaning up spilled seed minimizes attraction. While complete prevention is challenging, a combination of strategic placement, seed choice, and AI-powered detection can significantly reduce squirrel interference and protect your birdseed supply.
Troubleshooting Common Issues
Connection Problems: If the feeder fails to connect via Bluetooth, ensure Bluetooth is enabled on your device and the feeder is in pairing mode. Try the QR code connection as a backup. Restarting both the feeder and your mobile device often resolves connectivity issues. Check your Wi-Fi network stability.
App Functionality: If the live view is unstable, verify your internet connection. For AI bird recognition failures, ensure you have an active subscription. Clear the app cache or reinstall the app if problems persist. Check for app updates regularly.
AI Recognition Errors: The AI is constantly learning, but occasional misidentification can occur. Report incorrect identifications through the app to improve accuracy. Ensure clear video footage for optimal recognition. If the feeder isn’t detecting birds at all, adjust the motion detection sensitivity. For all other issues, consult the FAQ section or contact VicoHome support.
Frequently Asked Questions (FAQ)
Q: Does the bird feeder support cloud storage? A: Yes, the VicoHome smart bird feeder offers up to 3 days of free cloud storage for bird videos via the Vicohome app. You can extend this with a paid storage plan.
Q: Can I view the feed on a tablet or computer? A: Currently, the VicoHome app is primarily designed for mobile devices. Compatibility with iPads and computers is under development, but not yet fully supported.
Q: What about squirrel interference? A: While the feeder doesn’t have a mechanical squirrel deterrent, the AI is designed to recognize squirrels. Users have requested an alarm feature for squirrel detection, which may be implemented in future updates; The feeder is designed to withstand typical squirrel activity.
Q: How does the AI bird recognition work? A: It utilizes advanced machine learning algorithms to identify bird species in real-time, saving images/videos and providing bird information. A subscription is required to access this feature.
Powering the Bird Feeder
The VicoHome Bird Feeder operates using a dedicated power adapter, included in the unboxing. Ensure the adapter is securely connected to both the feeder’s power port and a functioning electrical outlet. Avoid using extension cords or power strips, as they may interfere with the feeder’s performance.
Initial power-up will activate the camera and initiate the connection process with the VicoHome app. A solid power indicator light confirms successful power connection. If the light doesn’t illuminate, double-check the adapter connection and outlet functionality.
For optimal performance, use the provided adapter. Third-party adapters may not deliver the required voltage and could damage the device. The feeder is designed for continuous operation, but periodic checks of the power connection are recommended. Do not expose the power adapter to moisture or extreme temperatures.
Cleaning and Maintenance
Regular cleaning is crucial for maintaining a hygienic environment for birds and ensuring optimal feeder functionality. Disconnect the power adapter before commencing any cleaning procedures. The feeder’s components, particularly the seed reservoir and perches, should be cleaned every two weeks, or more frequently during periods of high bird activity.
To clean, disassemble the removable parts and wash them with warm, soapy water. Avoid using harsh chemicals or abrasive cleaners, as these can be harmful to birds. Rinse thoroughly and allow all parts to dry completely before reassembling. The camera lens can be gently wiped with a soft, dry cloth.
Inspect the feeder regularly for any signs of damage or wear. Ensure all screws and connections are secure. Proper maintenance will prolong the life of your VicoHome Bird Feeder and provide a safe and enjoyable feeding experience for your feathered friends. Store the feeder in a dry place when not in use.
Safety Precautions
Prioritize safety during the installation and operation of your VicoHome Bird Feeder. Always disconnect the power adapter before performing any maintenance or cleaning. Ensure the feeder is mounted securely in a location that prevents accidental falls or tampering. Keep the power cable away from potential hazards, such as water sources or areas with heavy foot traffic.
Do not attempt to disassemble or repair the electronic components of the feeder yourself. This could result in electric shock or damage to the device. If you encounter any technical issues, contact our customer support team for assistance. Avoid exposing the feeder to extreme temperatures or humidity.
Supervise children when they are near the bird feeder. Small parts could pose a choking hazard. Regularly inspect the feeder for any signs of damage that could create a safety risk. By following these precautions, you can ensure a safe and enjoyable bird-watching experience for everyone.
Warranty Information
VicoHome warrants this Bird Feeder against defects in materials and workmanship for a period of one (1) year from the date of original purchase. This warranty covers normal use and does not extend to damage resulting from misuse, abuse, accidents, unauthorized modifications, or natural disasters.
To claim warranty service, please contact our customer support team with proof of purchase and a detailed description of the defect. We will, at our discretion, repair or replace the defective product. This warranty is non-transferable and applies only to the original purchaser.
This warranty does not cover consumable parts, such as the power adapter or SD card. Any attempt to repair the product by unauthorized personnel will void the warranty. VicoHome’s liability under this warranty is limited to the purchase price of the product. For full warranty details and terms, please visit our website at [insert website address here].